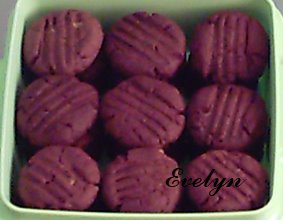
I have been itching to bake this
Pineapple Tarts since I saw
Janny's photo. But I have heard and read numerous comments that it is an extremely tedious job. Since I love
Pineapple Tarts so much and this particular recipe by
Joshua have had rave reviews, with the encouragement from fellow bloggers like Ching and Judy, I thought why not.
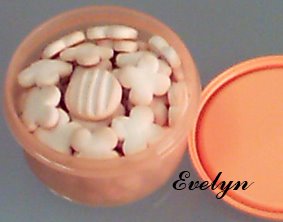
After gathering all the ingredients and a brief consultation with Joshua, I embarked on my mission. The part about cooking the jam is a real killer!!! It took me two and a half hour, instead of one hour as stated in the recipe, to see the golden colour. Perhaps I did not squeeze the juice dry enough which resulted in that.
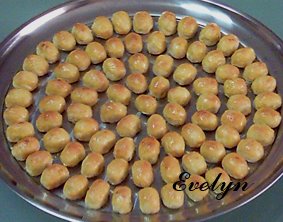
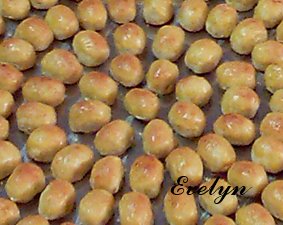
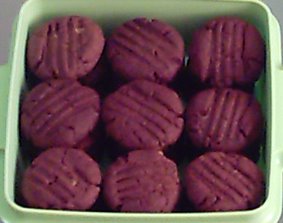
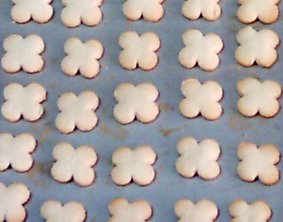
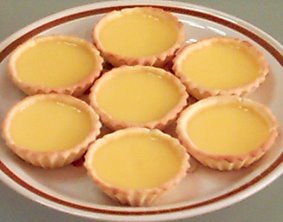
The second part was much easier. I chose to make the enclosed-type. Mixing the dough was easy and wrapping the pineaple jam with the dough was blissful. After the first tart was out of the oven and cooled, I popped it into my mouth and I was like "Oh my god!!! I need to spank Josh!" *lol*
In case you are wondering why spank Joshua, the reason is, I couldn't stop after the first tart. I popped quite a few and had to force myself to stop! *lol* No regret for the hard work. It is worth the effort.
 Melt-in-the-Mouth Pineapple Tarts (2005 Version)黄梨酥Pineapple Filling
:
Ingredients:
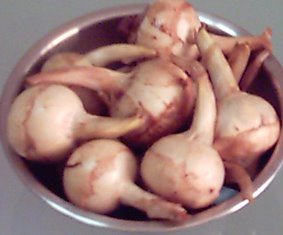
4 pineapples
9 cloves
caster sugar (I used 150g caster sugar and about 4 tbsp of honey)
Method:
Peel the pineapple.
Grate the pineapple using a grater or using a juicer (grater better).
Squeeze out the juice from the grated pineapple fibre.
In a frying pan, put the pineapple fibre and heat using low flame.
Add cloves and fry till water has dried up halfway.
Add sugar to taste. (Amount depending on how sweet pineapple was originally and how sweet you want filling to be)
Continue frying till filling starts to dry and turns golden in colour (abt 1 hr later)
Note: While frying, you have to stir continuously and remember to keep the flame small. Its easier to add sugar by dissolving it in some of the unwanted pineapple juice and adding this to the grated pineapple.Dough:
Ingredients:
250g golden churn butter
170g cream (I used Nestle UHT cream in the can)
75g caster sugar
400g Top flour or Cake flour
30g Corn flour50g cream cheese (Using Kraft Philadelphia)
3 egg yolks
1 additional egg yolk + 1 tsp caster sugar (for glazing)
Method:
Sift Top flour and corn flour together.
Using a cake mixer, blend the cream, butter, cream cheese and sugar together till you get a creamy mixture. (10 mins on speed 2)
Add the 3 egg yolks and sifted flour into the creamed butter mixture.
Using the cake mixer's dough mixer, mix till it becomes a smooth dough that is oily enough to not stick to your hand
Allow the dough to stand for 10 mins. (Chilling helps if you are making the pineapple on top kind)
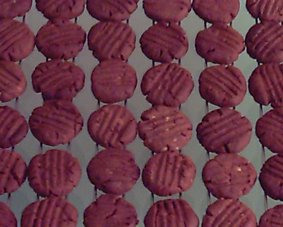
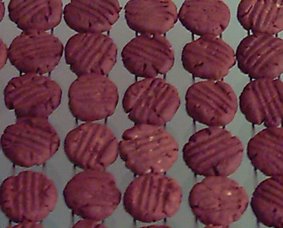
Divide dough into small balls and the pineapple filling into balls roughly 1/2 the size of the dough.
Wrap filling ball with dough ball and shape as desired.
Glaze with the glazing mix.
Bake at 180 degrees celsius for 15 mins in a oven. (If using convection oven with turbo fan, lower temperature to 160 degrees celsius)
Remove from oven and reglaze again before baking for another 5 mins till golden brown on top.
Tazz's Note: It yielded 110 Tarts. Totoal weight of the dough was about slightly more than 1 kg. I divided the dough into 10 equal parts, then subdivided into another 11 parts. My advice is to roll the jam into balls first before starting to mix the dough because if one is too slow, the dough will ooze oil.


.jpg)
.jpg)
.jpg)
.jpg)
.jpg)
.jpg)
.jpg)

.jpg)
.0.jpg)
.jpg)
.JPG)
.jpg)
.jpg)


.jpg)


.jpg)
.jpg)