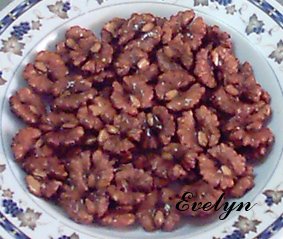
Monday, March 27, 2006

Sweet Corn Pudding

Jingle shared a Banana Pudding recipe with us. I was so useless, I failed in my attempt. My first mistake was to cut the bananas too early, then the bananas turned dark brown before I added into the custard mixture. The second mistake was to add too early, instead of waiting for the mixture to thicken. The bananas disintegrated completely into the mixture and when the mixture thickened, I had difficulty stirring and some mixture at the bottom got burnt. Well, I didn't throw away at that stage, the colour of the whole mixture eventhough was not bright yellow like Jingle's, it was still presentable, so I poured the mixture into a big rectangular Tupperware tray. An hour later, when I checked the pudding in the fridge, haha... to my horror, the whole pudding turned almost black!!!!!! Hmm.. quite sad because banana is Ni's favourite and she was looking forward to the Banana Pudding.

I told Jingle about my mistakes and she suggested that I used half a can of creamy corn to replace the bananas, in my next attempt.

Well, I tried the recipe with creamy corn. As I did not have enough custard powder to do the whole recipe, I made adjustments to the ingredients. With the creamy corn, it was much easier. The pudding turned up fine but I think (just think, k?) with a little more water, say about 50ml, the pudding will be perfect!!


Sweet Corn Pudding

Ingredients:
1/2 can creamy corn
100g sugar
340ml water
4 pandan leaves, washed and tied into a knot
140g evaporated milk (carnation brand)

100 gm of custard powder + 180ml water


Method:

Bring water to boil in a pot with the pandan leaves.

Prepare 100g of custard powder + 180ml of water in a mixing bowl. Stir to mix well and set aside.

Once the smell of the pandan leaves is fragrant, discard the pandan leaves and add sugar into the boiling water.

When the sugar is dissolved, stir in the custard mixture gradually until it thickens.

Lower the heat and add in evaporated milk follow by the creamy corn, keep on stirring.

When the mixture bubbles, turn off the heat.

Rinse the tray/mould with cold water, then pour in the cooked mixture.

Leave it to set, serve as a cold dessert.

Saturday, March 25, 2006

Kyoto Spare Ribs

This Kyoto Spare Ribs (Jing Du Spare Ribs) recipe is from Jingle's Kitchen. When I first saw the photo of this dish, I was instantly attracted to it. I wanted to cook it at that time but was put off by the numerous types of ingredients used in the recipe, especially the various types of sauces, because I already had so many bottles of sauces in my fridge. Finally I managed to clear some and when I bought the HP sauce and plum sauce specially for this dish, I felt less guilty.

Before I cooked this, I was worried that the spare ribs might be tough, I remembered Jingle told me that the ginger juice would tenderise the spare ribs but I was a little sceptical, so I marinated the spare ribs for two hours instead of the one hour stated in the recipe. Wow! the end result was ichiban neh! The meat tasted juicy and tender and I could see the satisfying smile on the faces of my three gluttons. *lol*


Kyoto Spare Ribs
京都排骨 (Jing Du Spare Ribs)

Ingredients:
500g of pork ribs (small pork ribs)

Marinade:
1/2 tbsp of light soya sauce
1/2 tbsp of ginger juice
1/4 tsp 5-spice powder
1/2 egg
1-1/2 tbsp of cornflour
1-1/2 tbsp of custard powder

Gravy:
2-1/2 tbsp of water
1 tbsp of tomato sauce
1 tbsp of A1 sauce or HP sauce
1/2 tbsp of oyster sauce
1/2 tbsp of chilli sauce
1/2 tbsp of sugar
1/2 tbsp of plum sauce
1/2 tsp of sesame oil
3/4 tsp of cornflour

3/4 tsp chinese wine

Garnishing:
Chinese lettuce
Parsley


Method:

Cut the pork ribs into about 1-1/2 inches long each. Do not overwash as it will affect the absorption of marinade. *

Marinate the pork ribs for 1 hour. **

Mix the gravy ingredients in a bowl and set aside.

Heat 2 bowls of oil, when you see tiny bubbles in the oil, put the marinated pork ribs and fry at high heat and reduce to medium heat until ribs are cooked (Use a wooden chopstick to poke the meat, if it is soft, the ribs are cooked). Dish and set aside.

Leave about 1 tbsp of oil in the wok, put 1/4 tbsp Chinese wine, then pour in the gravy to cook till it bubbles, put in the fried pork ribs and stir to coat well. Once the ribs are shiny, turn off the heat.

Dish the pork ribs and place on top of the lettuce, on the plate. Garnish with parsley.

Tazz's Note: * I dabbed the pork ribs with paper towel after washing. ** I marinated for 2 hours.

Monday, March 20, 2006

Cereal Prawns

I got this recipe from M4M forum sometime ago. My three gluttons were very delighted with this dish. As per forummer's advice, I coated the prawns with potato starch before deep frying all.

One thing I need to mention here is the tip given at Jingle's Blog, I learnt that to prevent the prawns from absorbing too much oil, the oil has to be very hot. In the past, whenever I deep fried any prawns, I was always worried that the oil would splatter all over the place, so I tend to lower the heat and let the prawns take a longer time to cook. Thus, I ended with very oily prawns. Thanks Jingle for this enlightening post and not to forget the one who shared this recipe at M4M forum (sorry, can't remember the User Name of the forummer and it is impossible to trace because I got it from the old forum), thanks for the wonderful recipe!


Cereal Prawns

Ingredients:
300g big prawns (trimmed, washed and drained)
Some potato starch
4 cups oil for deep frying

A:
3 tbsp butter/margarine
3 egg yolks, beaten lightly

B:
1 tbsp chopped garlic and shallots
1/2 tbsp chicken stock granules
1/2 tsp sugar
2 sprigs curry leaves – sliced
6 chilli padi – sliced
Dash of salt & pepper to taste

C:
5 tbsp Instant Nestum Cereal


Method:

Coat prawns with potato starch.

Heat up oil, make sure oil is very hot, add prawns and deep fry for 1 minute. Dish and drain.

Leave 1/2 cup of oil in the wok, sauté A till fragrant, add B and continue to fry till fragrant. Add prawns and fry till aromatic.

Lastly, add C and fry till dry. Dish up and serve hot.

Saturday, March 18, 2006

Mango Yogurt Cheesecake

I have been so stressed by the happenings around me, so I made this Mango Yogurt Cheesecake to destress and at the same time, to treat those who are partly causing the stress. Funny right? Well, they have not done any harm to me except that I am stressed because they are stressed. That's Tazz, when they are stressed, I will be affected indirectly. But! If they are fine, then I will nag more and cause some stress for them. *lol*

Recipe is adapted from Fantastic Cheesecake by Alex Goh. His is with decorative sponge lining whereas I chose to use two pieces of vanilla sponge cakes.


Mango Yogurt Cheesecake
(8" cake pan)

Cake Base:
2 pieces of 18cm round vanilla sponge cake with thickness of 1.5cm each.

Filling:
250g cream cheese, room temperature
40g sugar
1 tbsp lemon juice
150g mango, diced
150g plain or mango yogurt
1-1/2 tbsp gelatin
60g water (to dissolve gelatin)
150g whip topping cream, whipped


Method:

1. Dissolve gelatin with water over a double-boiler. Keep warm and set aside.

2. Cream cheese and sugar till smooth and creamy.

3. Place diced mango and lemon juice in the blender and blend it until fine. Add into (2) and mix until well combined.

3. Add the yogurt and mix until well blended.

4. Add the cooled gelatin solution to cheese mixture until well blended.

5. Fold in whipped topping cream and mix until well combined.

6. Pour half the cheese filling into the prepared spring form pan (or cake ring) over the sponge cake. Top with second layer of sponge. Pour the remaining half of the cheese filling and smooth the surface. Refrigerate for 3 hours or until firm.


For the Cake topping:
I used 1/2 pkt of Hollyfarms Mango Dessert mixture boiled with 250ml of hot water. When cooled, have to work very fast to spread on top of the cake before it sets. Goes very well with the cake.

Tuesday, March 14, 2006

Steamed Glutinous Rice

Tried this Steamed Glutinous Rice by Lena(aka Ltan), at Edith's place and I liked it so much. So I requested the recipe from Lena and she was so generous to share her recipe, at Nurkochen, with me. A big thanks to Lena!! Hmm... I cooked this last Saturday but it took me so many days before I decided to post it here, think I am getting lazy nowadays. Maybe because the rest of my fellow food bloggers are slowing down, thus affecting my enthusiasm as well?


Steamed Glutinous Rice

Ingredients:
1 kg glutinous rice
50g dried mushroom (soak with water)
50g dried shrimps (wash and drain)
200g pork belly/lean pork
100g shallots (small onions)
350-400ml water
1 tsp chicken flavour seasonings
1 tsp salt or to taste
Cooking oil

Seasoning:
2 tsp oyster sauce
2 tsp sugar
2 tsp light Soya sauce
2 tsp dark Soya sauce
1 tsp pepper
3 tsp sesame oil

Garnishing:
Fried peanuts (optional)
Spring onions for garnishing
Fried shallots (smalls onions)


Method:

Wash the glutinous rice and soak in water. (No need to soak over night, 1/2 -1 hour will do)

Slice softened mushroom, pork and shallots thinly.

Use half of the seasonings to season the mushroom and the other half for the pork.

Fry the sliced shallots and set a side and do the same with the dried shrimps.

Fry the mushroom well then add the pork and fry for about 5 minutes.

Drain the glutinous rice and add into the mushrooms and pork.

Put in half of the fried shallots; keep the other half for garnishing add in all the fried dried shrimps, the chicken seasoning powder and salt. Fry for a few minutes. When it is well mixed, add in the 350 ml of water and turned off the flame. Stir well.

Put into a big pan and steam for 40 minutes or until done.

You may sprinkle some water on it if you find the glutinous rice is still hard or uncooked.

Thursday, March 09, 2006

Baked Toffee Walnuts

I spent my time reading Blogger Hacks and ended with no time to try new recipes, so, I thought I baked this simple snack to treat my three busy bees when they returned. This recipe is from Leisure Cat.


Baked Toffee Walnuts

Ingredients:
100g walnuts
30g sugar
20g honey
15g evaporated milk
15g butter


Method:

Bake walnuts in preheated oven at 180 degree Celsius for 15 minutes. Set aside to cool.

Put the rest of the ingredients in a pot and stir in low heat until thickens (colour will be the same as toffee). Turn off the heat.

Put all walnuts into the pot and mix until all are well coated with toffee.

Place all coated walnuts on baking sheet and when cooled, keep in an airtight container.

Saturday, March 04, 2006

Spicy Salmon with Green Mango Salad

Made this Spicy Salmon with Green Mango Salad for lunch today. Recipe is from AsiaOne Wine & Dine. I adjusted the ingredients to my preference, and served with Fried Bee Hoon (Vermecelli) instead of rice. The combination of this dish with my simple Fried Bee Hoon was great.

For the Fried Bee Hoon, I used the oil which was left from frying the salmon. Just fried with some chicken broth, light soy sauce, fish sauce and a pinch of salt. I also added some beaten egg and bean sprouts.


Spicy Salmon with Green Mango Salad

Ingredients:
250g salmon, cut into 12 strips
1/4 tsp salt
1/2 tsp turmeric powder
1 tablespoon canola oil

For the salad:
2 green mangoes, skinned and shredded
2 red tomatoes, roughly chopped
Half a cup of roughly chopped coriander leaves
Half a cup of mint leaves
4 shallots, sliced

For the dressing:
2 tbsp lime juice
2 tbsp lemon juice
3-1/2 tbsp sugar,preferably grated palm sugar
2 tablespoons fish sauce
1 clove garlic, finely chopped
3 chilli padis (more if you like it hot), finely chopped

For the garnish:
Extra mint and coriander leaves


Method:

Rub salt and turmeric all over fish pieces.

Heat oil and fry fish. Drain on kitchen paper.

In a large glass bowl, mix all salad ingredients.

In a separate small bowl, combine all dressing ingredients. Adjust seasonings to taste if necessary.

Pour dressing over salad and toss to mix.

Spoon salad onto plates, place fish on salad and garnish with extra mint and coriander leaves.